
H1 LED Bulbs, 2024 Upgraded Ultra-Bright 20000 Lumens, Cool White 6000K
Discovering your headlight is broken as you leave the garage can be annoying. If you should drive at evening, it is even far more annoying. The subsequent step for most people is to have the vehicle serviced. This is regularly the 1st logical action to take when a bulb is poor. It can be difficult to attain the bulb to commence with.
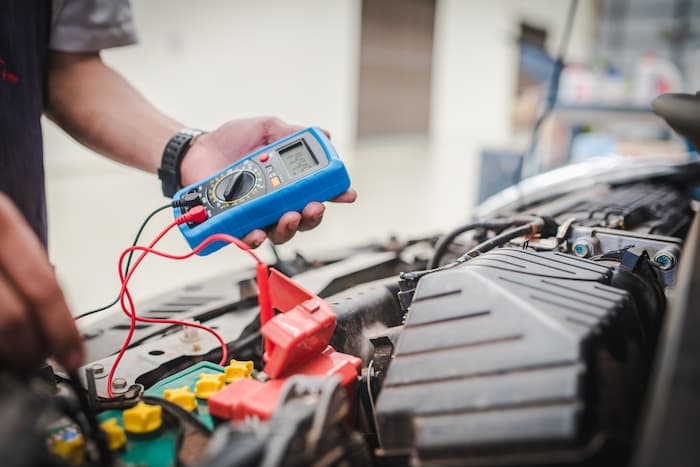
Additionally, correcting it could look like a hard undertaking. But it is easier than you anticipated. You can test your headlight bulbs with a multimeter and replace your headlight if needed. You must now take the vehicle to the mechanic to see if the vehicle has a issue. When light bulbs cease operating, the issue is regularly ma za aa aswith the bulb. That implies that you can repair it your self without having seeing a mechanic. This guide explains how to use a multimeter to test headlight connectors/bulbs.
Steps to test a headlight bulb and connector utilizing a multimeter

It is crucial to note that particular automobiles incorporate a set of spare light bulbs. They are in the trunk of your vehicle. If your vehicle does not come with a set, you can acquire a fresh set at the shop. It is advised that you have at least a single set in your vehicle so that you can speedily replace a poor bulb. You must anticipate to spend anyplace from $eight to $150 for a new set of bulbs. The price tag will differ based on your car’s make, model, and output socket, amongst other elements.
- First step: Locating the bulb
You’ll need to have a digital multimeter in this scenario. You can comprehensive the activity without having buying an costly piece of gear. The glass or plastic cover of the vehicle demands to be taken off 1st. To access the bulb, use this technique. Carefully unscrew the bulb from the socket following removing the cover.
- Second step: Setting up your multimeter
Take your multimeter and switch to continuity mode. Depending on the sort of gadget you have, you could potentially set it to 200 ohms. If the multimeter is appropriately set to the continuity mode, it is basic to verify. Press the probes with each other although waiting for a beeping sound to achieve this. It will generate the sound if the continuity mode is appropriately set.
The following step is to discover your base quantity. You should evaluate the statistics you receive from the base quantity to the ones you receive following testing the vehicle lighting. This will reveal whether or not your bulbs are nevertheless functional.
- Third step: Placing the probes
The black probe must subsequent be placed into the bulb’s unfavorable location. Press the red probe for a short period against the good pole. A beeping sound from the multimeter indicates that the bulb is operating flawlessly. If the bulb switch breaks, there would be no continuity, so there would be no sound.
The outward look of your bulb can also be employed to figure out whether or not it is functioning effectively. It is broken if there are black streaks inside the bulb. However, if there are no indicators of overloading or cracking harm, the issue could be far more internal.
- Fourth step: Understanding your reading
Even although the bulb seems in fine physical situation, a defective bulb would not register any reading on a digital multimeter. This is due to the absence of a loop. If the bulb functions effectively, the reading will be rather close to the earlier baseline. For instance, a very good bulb must fall inside the variety of the reading if the baseline is 02.eight. It is crucial to note that the kind of bulb your vehicle makes use of will also impact the reading. For instance, if the reading is above zero, the bulb is nevertheless functional when utilizing an incandescent bulb. If it reads zero, on the other hand, the bulb needs to be changed.
If your headlight bulb is fluorescent, a measurement among .five and 1.two ohms indicates that the bulb has continuity and must be operating. If it reads significantly less than the minimum, on the other hand, it is defective and demands to be replaced. It is crucial to note that a profitable reading does not necessarily indicate that the bulb is operating effectively. Therefore, you must make contact with your mechanic to have a specialist verify if your light bulb is not operating even when the digital multimeter indicates that it is in fine situation.
- Fifth step: Testing the connector
The connector will then be examined to figure out its situation. The connector at the back of the headlight bulb should 1st be removed. To steer clear of removing the wire from the connector when removing the connector, be cautious. The connector is bi-directional. Place the probe on a single of the connector’s sides. You can adjust the digital multimeter to 20VDC if you use a 12VDC base voltage. Now, enter your vehicle and switch the headlight to see the reading.

The reading should be as close as feasible to the base voltage. If it is quite low, there is a issue with the connector. The issue lies with the bulb or bulb switch if the connector is functioning effectively. To rectify the issue, either replace the bulb or repair the switch.
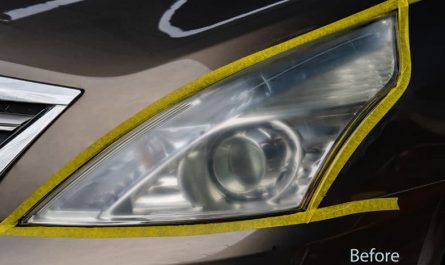
The reality that you can apply this to other bulbs could be of interest to you. The household bulbs that are not operating any longer can be tested. Despite any variations in the outcome, the ideas stay the very same. Following these straightforward actions, you can test your headlight bulbs and address any issues. If the bulb is the issue, you can take care of it independently. Your headlight will turn on when you acquire and set up a new bulb. However, if following installing a new bulb and the light emitting from it is not as vibrant as it must, you need to have to restore the headlight lenses utilizing a Headlight Restoration kit.
You may possibly also need to have to go to a mechanic if it is a mechanical malfunction, such as an problem with the switch, connector, or bad fuse.

Now retrieving an image set.
PULIDIKI Car Cleaning Gel Universal Detailing Kit Automotive Dust Car Crevice Cleaner Slime Auto Air Vent Interior Detail Removal for Car Putty Cleaning Keyboard Cleaner Car Accessories Blue
$6.99 (as of April 26, 2024 17:04 GMT +00:00 - More infoProduct prices and availability are accurate as of the date/time indicated and are subject to change. Any price and availability information displayed on [relevant Amazon Site(s), as applicable] at the time of purchase will apply to the purchase of this product.)
Now retrieving an image set.
EcoNour Car Window Shade for Baby (2 Pack) | Retractable Printed Car Window Screen for Complete Protection | Enchanting Lions Prints (15" x 17") | Window Sun Blocker for Car Keeps Your Vehicle Cool
$17.99 (as of April 26, 2024 17:04 GMT +00:00 - More infoProduct prices and availability are accurate as of the date/time indicated and are subject to change. Any price and availability information displayed on [relevant Amazon Site(s), as applicable] at the time of purchase will apply to the purchase of this product.)
Now retrieving an image set.