Headlights get cloudy more than time and can grow to be dangerously dim if you do not restore it with a headlight restoration kit. It is a legal requirement to preserve your headlights in a great operating situation. The two principal techniques that headlights degrade more than time are dimming bulbs and discolored headlight casing. Foggy headlights and dimming beams can impact even the most diligent drivers. If your headlights are not operating correctly, it may well be as a outcome of the following instances.
Burned-Out Bulb
Corroded Socket
Blown-Out Fuse
Electrical Short
Electrical Open
Charging System Problems
Most instances, all you need to have to do is either replace a light bulb, verify a socket or test the circuit and switches to confirm no matter whether existing is flowing or not. Though some of these tasks may possibly appear difficult, you will be dealing with easy concerns most of the time. Your most tough activity will most likely be obtaining access to elements, based on the distinct model. But if you are a DIY sort of individual, you can verify out our preceding write-up on how to change car headlights.
Notwithstanding, to stay away from chasing false leads and make a productive repair, you need to have to know when to replace your headlights, exactly where to begin, and the possible causes you may possibly be dealing with. This guide will show you the causes behind most of the frequent headlight failures and some sensible tactics that will aid you 1to diagnose and repair your headlights more quickly.
Headlight concerns and techniques to repair them
One of the headlamps does not operate:
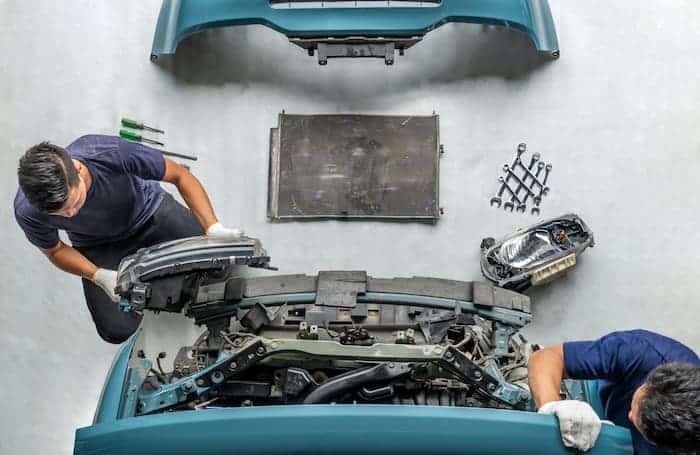
When 1 of your headlamps does not operate no matter whether it is the higher or low beam, the very first point to do is to verify the lamp or bulb itself. Having access to the headlamp or bulb for inspection or replacement is not tough. To get you began, comply with the actions beneath.
Step 1: Removing the headlamp
Older vehicle models use a sealed-beam headlamp, mainly secured by a bezel and a retaining ring with a couple of screws. Check about the perimeter of the headlamp and get rid of the screws that hold the lamp in spot. If need to have be, access the electrical connector from the rear of the assembly.
Step two: Removing a halogen bulb
Most modern day automobiles use composite headlights, i.e. a halogen bulb proper inside the headlamp housing. You can access this bulb by way of the rear of the light assembly. To do this, apply the actions beneath:
Pop the hood open.
Locate the rear of the headlight lamp you want to adjust.
Unplug the bulb’s electrical connector by
Push and screw the base of the connector about a quarter of a turn anticlockwise.
Carefully pull the socket out of it housing or
Unscrew the ring that is holding the connector in spot about a quarter of a turn anticlockwise.
Remove the ring and pull the socket out of its housing.
Always seek advice from your automobile repair manual to avoid harm to the assembly, if need to have be. While inspecting the bulb, appear at the filaments inside. If the bulb is undesirable, its filament(s) will be broken into halves.
Step 3: Checking for continuity
You verify for continuity if you are not particular if the filament is broken
Adjust your digital voltmeter (DMM) to the lowest setting on the Resistance scale.
Turn-on your DMM and strike the meter probes on each sides of the bulb contacts.
Your meter will beep or show zero resistance if there is continuity and if otherwise the show will show infinite resistance, overload or no sound, based on the meter configuration.
My headlights flickers:
Flickering headlights is not actually frequent but can also grow to be a difficulty. It may possibly be triggered by:
Bad headlamp switch
Strange resistance in the circuit
Loose or corroded connection
Poor circuit grounding
Bad multifunction switch
Firstly, verify if each headlamps are flickering or just 1. If only 1 of the lamps is flickering, concentrate on that component of the circuit:
Check the energy and ground wires that hyperlink to the headlamp.
Check the electrical connector.
Check the bulb socket for a loose wire or corrosion on the connector.
If each headlamps are flickering, verify the section of the circuit that controls each lamps:
Adjust the switch among low and higher-beam to see if the lights flicker in each modes.
Check the switch.
Check for loose wires in the switch.
Check the multifunction switch.
Check the energy side of the circuit for a loose wire.
My headlights are dim:
Several faults like undesirable connections, worn-out bulbs or even broken wires in the circuit may possibly result in headlights to be dim. You may possibly notice that headlights dim in various engine operating situations. If the headlights are dim when the engine is off or although idling:
Confirm that the battery terminals are clean and tight.
Ensure that your battery is charged and is in great situation.
Check charging program output and drive belt for suitable operation.
Inspect the light bulbs for suitable installation or put on.
If headlights dim when the engine speed is above Idle:
Check the charging program output and make certain the drive belt is operating correctly.
Check for voltage drop in the circuit.
Check the light bulbs.
My headlights do not operate:
In some frequent instances, none of the headlights may possibly operate in either mode. Always make certain that the circuit fuse(s) is great and connected correctly. Also, if each of your headlights are not operating verify the light bulbs and make certain they are in great situation and not burned out. Different electrical faults like blown fuse, no energy to the circuit, failed switch, undesirable multifunction switch and undesirable dimmer switch can preserve the headlights from operating.
Finding an open in the circuit:
An “open” in the circuit can cease 1 or each headlamps from operating. The open may possibly be triggered by a disconnected wire, a loose electrical connection, a failed switch/relay or even corrosion in a connector.
Step 1: Check the fuse:
With a test light, verify for energy coming into the circuit fuse(s). If there’s no energy, verify the panel connections and the situation of the wire and connections among the panel and the battery. Should the difficulty be as a outcome of a undesirable headlight relay, study our DIY fixes for bad headlight relay.
Check for energy on the output side of the fuse. If there is no energy, verify the fuse and the panel connections.
Step two: Check the light socket:
Ensure energy is getting into the socket.
Ensure you have a great ground at the socket as effectively.
If energy is not reaching the socket but there is energy from the fuse panel into the circuit, verify the circuit among these two points. Also verify energy going to the switch and relay, based on your distinct model and if need to have be, seek advice from your vehicle repair manual to achieve access to elements.
Step Three: Check the headlight switch:
Ensure that energy is reaching the switch.
Ensure that energy is flowing from the switch to the circuit.
If energy is not flowing to the headlight switch, verify the wire among the switch and the fuse panel.
If there’s no energy flowing from the switch to the rest of the circuit, verify for a drop in voltage at the switch and if the voltage drop is higher, adjust the switch.
My headlamp fuse keeps blowing:
It can be difficult at instances attempting to discover the supply of an electrical quick in a circuit. A quick takes place when a energy wire or hot wire (the wire carrying existing to the loads in the circuit) finds a quick path to a grounded surface. Most instances, the quick may possibly result in the circuit fuse to blow or 1 or a lot more light bulbs to burn out.
A quick in circuit takes place when
When the insulation of a hot wire breaks and the wire touches the physique metal.
When two components of a hot wire becomes pinched, cutting by way of the insulation and producing ground.
When a hot wire disconnects from the element and hangs loose, touching the ground.
When a hot surface melts the hot wire’s insulation thereby permitting the bare wire to touch a grounded surface.
Common techniques to find quick circuits are
Connect a test light across the blown fuse. If the test light comes up, there is a quick in the circuit.
Disconnect the light socket, switch and relay 1 at a time.
When the test light stops coming up, you have identified the component of the circuit exactly where the quick circuit is situated.
You can save on headlights repairs by fixing your headlights considerably more quickly at house employing a couple of easy tools and these easy methods described in this guide.