While car headlights are constructed to withstand considerable adjustments in humidity, temperature, and vibrations, they do sooner or later burn out and require replacement. Headlights that have blown out might be replaced at residence, even with no the use of any hardware. However, do make positive to keep away from these 5 common mistakes that can destroy your car. Since your headlights are so crucial for driving safely, it is crucial you repair your blown-out headlight as quickly as attainable.
Removing a blown-out headlight
Step 1: Open the automobile hood:
Since headlight bulbs can only be accessed from inside the car’s hood, you will have to open your automobile hood by pulling back the hood deal with positioned under the dashboard or at the Bottom of the dashboard to pop open the hood.
Step two: Disconnect the battery terminals:
Always disconnect the battery just before starting any perform on your vehicle’s electrical program. Locate your vehicle’s battery and loosen the nut on the unfavorable terminal with a hand or socket wrench. Remove the cable up and away from the terminal with the nut-cost-free, tucking it to the side of the battery to keep away from it from getting speak to with the terminal.
Look for the letters “NEG” or the unfavorable (-) symbol to uncover the unfavorable terminal.
The constructive terminal will not require to be disconnected.
Step 3: Locate the headlight housing
To obtain access to the headlight bulbs, take away any trim elements that are required: In several modern day vehicles, accessing the back of the headlight demands removing engine covers or plastic trim components. Remove the plastic clips that maintain the trim pieces in spot with caution, as they might be brittle and susceptible to cracking or breaking.
If you break 1, you can generally get a new clip at your nearest auto components shop.
For detailed guidance on how to attain your headlight, verify your vehicle’s service manual.
Step 4: Remove the negative headlight bulb
Remove the pigtail from the headlight wire: On the wire pigtail going into the back of the headlight, press down on the plastic release clip. Pull the clip backwards to disconnect it and take away the headlight bulb whilst sustaining stress on the release.
If you pull on the wiring, you could unintentionally pull it out of the pigtail. Check your headlights relays to see if you have a bad headlight relay as that can result in the lights to dim.
Check for harm on the inside of the pigtail. There may well be a fault with your car’s electrical program if there are indicators of burning or melting.
Installing a new headlight bulb
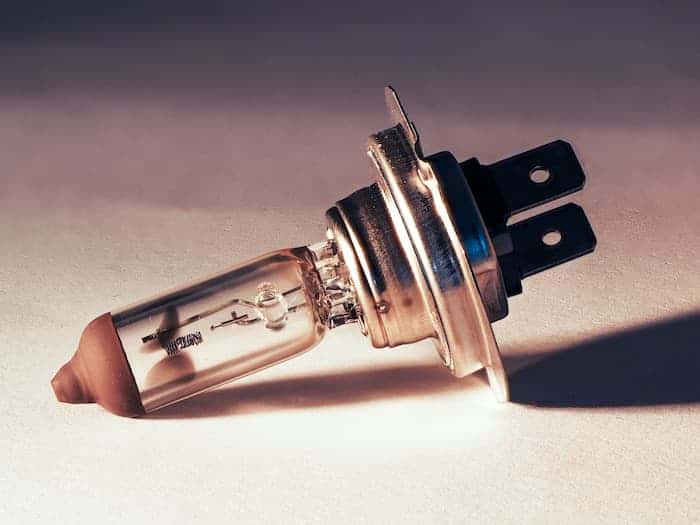
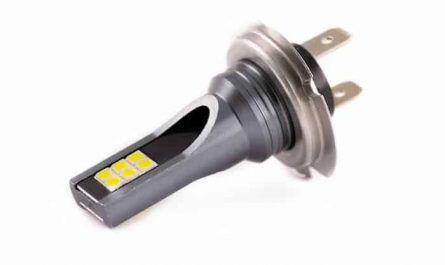
Step 1: Buy a replacement bulb:
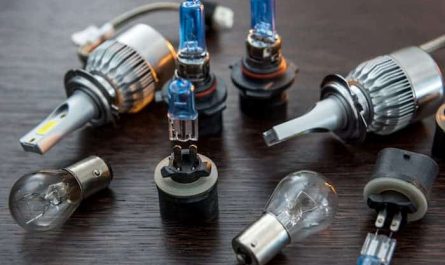
Some key retail or automobile components retailers offer you replacement headlight bulbs. Here is how to know which headlight bulb fits your vehicle. Also, you can just offer the clerk at the autoparts retailer with the vehicle’s year, make, and model to acquire the greatest match.
To guarantee that each headlight bulbs have the identical quantity of brightness, you will want to replace them at the identical time.
The bulb component quantity can also be identified on the automaker’s web site.
Step two: Unwrap the new headlight bulb for installation
Without touching the bulb, take away it from the box. Since the oil on your hands will harm the bulb in most modern day headlights, it is crucial not to touch the bulb’s glass with your fingers when you take away it from the box. If at all needed, maintain the bulb by the base.
Gloves can also support to shield the bulb.
Step 3: Wiping the bulb if you mistakenly touched it
Rubbing alcohol ought to be utilised to clean the bulb. If you inadvertently hit the headlight bulb’s glass, soak a rag in rubbing alcohol and wipe the bulb down. This will extract the oils from your skin whilst also extending the bulb’s life.
After cleaning the bulb, make positive to wipe it dry.
Using the rag to hold the bulb will maintain you from hitting it once again.
Step 4: Installing the new headlight bulb
While there are different types of headlight housing, guarantee you position the bulb firmly in the housing: If the bulb is fitted with a plastic assembly, slip it into the headlight housing just before installing the bulb and assembly. To lock the bulb into spot inside the headlight housing, turn it clockwise.
To maintain the bulb in spot, you require to turn it a quarter turn.
When you insert the bulb, be cautious not to bang it against anything.
Step 5: Connect the pigtail for the headlight cable
Attach the wire pigtail to the bulb’s backside. Make positive it seats equally. You’ll hear an audible click as the plastic releases latch into spot when the pigtail is attached appropriately.
Until reconnecting the pigtail, clean it with an electrical component cleaner.
An electrical cleaner is sold at most electronics and automobile components shops.
Step six: Replace and trim component you removed
Return any trim elements you had to take away to get to the new bulb when it is in spot. Since some pieces can overlap, reassemble them in the reverse order in which they have been removed.
Reconnect the battery and verify that the new headlights perform.
If you are removing each lamps, repeat the process on the other side.
Replacing sealed beam style headlights
If you are utilizing a sealed headlight beam, replacing your car’s headlight bulbs might appear a bit tasking as the complete headlight housing is sealed. To get you began right here are top 5 sealed headlights replacement hacks.
Step 1: The trim about the headlamp ought to be removed:
In older model cars, sealed beam headlights have been well-known. These headlights are totally self-contained and variety in diameter from 3 to 5 inches. Start by removing components of the vehicle’s exterior trim about the headlights, as these headlights need to be removed.
Depending on the application, you do not require to take away any trim elements.
Step two: Remove components of the grill
If needed, take away components of the grill: To access the headlight screws and connections on some cars, you will require to take away all or portions of the grill. To determine which components of the grill, if any, you will require to reduce, seek advice from your vehicle’s service manual.
The grill is generally fixed with bolts along the best and a set of clips if you require to take away it.
You require to get the screws holding the headlight in spot. Remove anything that would stop you from reaching them.
Step 3: Remove the ring that keeps the light in spot by unscrewing it:
A metal or plastic ring that is fixed with numerous screws or bolts is extensively utilised to hold sealed beam variety headlights in spot. Remove every single of these fasteners with the proper hand tool (screwdriver or wrench) and set them aside someplace protected.
You’ll require to reuse the fasteners, so do not throw them away.
Be positive to repair any bolts or screws that are badly rusted or broken.
Step 4: Disconnect the wiring by apushing the headlight out toward you:
Remove the ring from the headlight and take it out of the front of the car with your thumbs and forefingers. Disconnect the wiring that runs into the back of the headlight till it has been slid out.
Depending on the automobile, you may well require to squeeze a wire pigtail with plastic releases to unlock it.
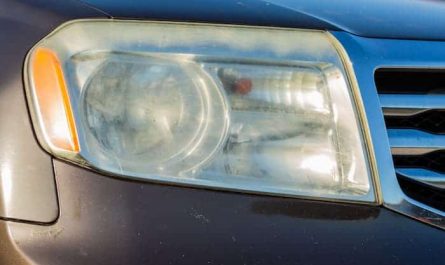
Examine the disconnected wiring for any indicators of injury. If you notice you also have an oxidized headlight, you can restore it utilizing a headlight restoration kit.
Step 5: Slide the new light into spot right after connecting it:
Remove the new light from the package and connect it to the loose wiring from the old light. Slide the headlight into the position exactly where the old 1 sat and hold it in that position till you can replace the ring that secures it.
Spray the wiring connectors with an electrical cleaner if they are dirty.
An electrical cleaner is obtainable at your nearest automobile components or electronics shop.
Step Six: Return the ring to its original place with a screwdriver.
Replace the metal or plastic ring more than the headlight and shield it with the fasteners you saved. If you can not uncover some of the adjustment screws, replace the headlight adjustment screws, return any trim or grill components you removed when you are completed and guarantee the headlights are effectively aligned to keep away from dazzling other road customers.
To test the headlight, start off the engine.
Check to see if the wiring is wired appropriately and cost-free of harm if the headlight does not perform.