Let me start off by asking you a query. Have you ever noticed these classic or much better however old rides with custom replaced headlights, hunting all chrome with complete vibrant HID or LED beam lightning up the road at evening from reflector-like headlight housing? What do you make of them? Beautiful is not it? Well, if you are a single of these motorists who have taken comfort in the belief that no a lot more beauty can come to your Chevrolet Corvette, Range Rover classic, or Jaguar XJ6 Series due to their round or rectangular lamps. Think once again since there are techniques on how to upgrade sealed headlights and these best five sealed headlights replacement hacks beneath would get you began!
The truth is, because soon after the 1980s there have been quite a few conversion alternatives for automobiles with sealed beam or reflector headlight housing. These alternatives like the H4 conversions permit you to replace these a single-piece units with headlight bulbs that are a lot more effective than your car’s stock headlights. But prior to we get began, let’s reacquaint ourselves with what type of Original-Equipment producers (OEM) lights we have installed on our vehicle.
Original gear manufacturer headlights for sealed beam
In the United States, most automobiles via the mid-1970s produced use of “round sealed headlights,” either two 7” headlight capsule, or 4 534″ capsule. The 7” headlight housing are combined with each low and higher beam even though the automobiles with 534″ headlight capsules make use of two low beam lights and two higher beam lights. But as at the mid-1980s, rectangular sealed beam headlight housing was introduced as an choice.
So, if you have two combos of low and higher beam, that implies they are 200mm (millimeter) even though 4 of the two combos of low and higher beam would be 165mm each and every. Some headlight producers contact the tiny lights 4” X 6” and the bigger ones 7” X 6”. For a lot more info about your stock headlights and understanding when to replace headlights, you can verify with your light’s manufacturer or appear at the quantity of electrical prongs in the back. Two combo of higher and low beam lamps have 3 prongs even though separate 4 of each and every two combo of higher and low beam have two prongs.
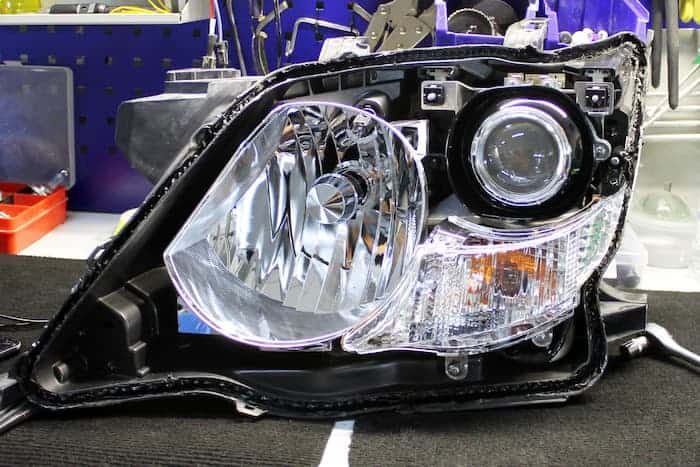
Now that you are conversant with the diverse OEM of your car’s headlight housing, would you like to spice factors up a small bit? Great! I think you are. So, let’s start off with round and rectangular headlight housing (sealed-beams). The conversion portion for these headlights are accessible and they consist of separate and replaceable bulbs such as HID or LED. When combined with sophisticated headlight housings and reflectors, the outcome is an extraordinary headlight with dazzling nonbinding beam that stretches more than 500ft ahead of you.
Unlike the sealed beam, which calls for a total headlight housing replacement when a bulb burns out, these conversion elements only call for you to attain out and replace a bulb or bulbs when they burn out with no getting to eliminate the headlight housing entirely – providing you an chance to upgrade your headlights from stock to LED. That’s not all! These conversions can also be utilized as a styling statement when parked. They come with all-chrome or blacked-out housings and are in the identical size and shape as that of your stock’s but with LED or HID strips just as you frequently see on the newest Audis and BMWs with completely functioning higher and low beams.
Best DIY hacks for sealed headlights replacement
Step One: Identify the retaining screws
Knowing how to change car headlights is a prerequisite for a effective headlight replacement. Start by removing any chrome, trim ring, or plastic bezel that might have been utilized to surround the headlights. To do this, you will want a screwdriver tool. The sealed beam housing itself is retained by a powerful metal ring. Round sealed beams are held by 3 screws even though rectangular ones are held by 4 screws. So, do not confuse these retaining screws with the aiming screws of the headlights.
NB: There are about two aiming screws per headlight – a single on either the best or bottom and yet another on either side of the housing.
Step Two: Remove the retaining screws
Before you eliminate the retaining screws of the headlight housing, spray them completely with a penetrating solvent. If you have none, you apply a drop of your engine oil. Now, hold the headlight on its socket as you eliminate the final retaining screw. Once you are carried out removing the retaining screws, reduced the headlight cautiously from its receptacle.
Step Three: Remove the wiring connector
At the back of the sealed beam headlight, you will uncover the wiring connector which pushes onto prongs. Gently pull it off. If you are utilizing a two headlight technique per unit, the prongs would be 3 even though a 4-headlight technique would have only two prongs with a wired connector.
Step Four: Reconnect the new conversion headlight
After pulling off the wiring connector from the back of the headlight, the subsequent step would be to reconnect the new conversion headlights. But prior to you do that, clean any kind of corrosion from the connector socket utilizing a headlight restoration wipe. Check that none of the wires are frayed or broken then push the wiring connector onto the prongs of the new headlight.
Step Five: Replace the headlight in its receptacle.
Place the new headlights in its receptacle and align the tiny bumps along the outer edge of the back of the headlight with tiny dimples in the headlight socket to make certain that you set up the headlight appropriately. Note that the wiring on the lens ought to also be upright and you ought to verify for a bad headlight relay prior to aligning the headlights. After that, hold nonetheless the headlight even though you reinstall the retaining ring, the trim ring, or bezel more than the headlight and you are carried out.