If you have ever driven at evening, then you will realize the significance of automobile headlights. More so, you will appreciate a effectively-aligned automobile headlight if you have practically been blinded by a bright blinding headlight. While headlights are a important component of every single automobile, they are of no use if they discomfort other motorists on the road – an action that could lead to critical accidents if care is not taken. Headlights can be very easily aligned and right here is how to know if your headlights are aimed properly.
However, their adjustment screws can put on out more than time or break from accidents – producing it tough to align and appropriately aim your headlights. The repair is basic, though dealing with a broken screw is simpler if you have at least a moderate quantity of knowledge functioning on automobiles. But in this write-up you will discover how to replace a headlight adjustment screw like a skilled.
Replacing your headlight adjustment screw for greater headlight aim
Tools necessary:
Screwdriver
Replacement
Tape
Tape measure
Step one particular
Purchase replacement screws
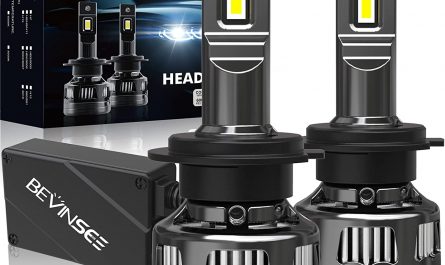
The 1st step to replacing your automobile headlight’s adjustment screws is to buy the precise match that fits the make and model of your automobile. You also have a greater likelihood of obtaining them if you know the year your automobile was manufactured or greater nevertheless, if the issue is a worn out or broken screw, you can just take these screws to your mechanic and they will give you a compatible replacement that fits your car.
You can either buy your adjustment screws on-line or you can order from your regional auto components retailers. Whichever technique you decide on, note that every of your headlights has a pair of adjustment screws that come with plastic casing utilised to safe them to the headlights. So, you are arranging on replacing all of them, you will want to acquire 4.
Step two
Locate the broken or worn-out adjustment screws
With your automobile parked in your garage or in front of a wall, open the hood and find the headlight adjustment screws. While the position of the screws varies according to the make of your automobile, you are most probably to discover one particular screw on best of the headlight and an additional by the side of the headlight housing.
The screws are created of silver and are diverse from the black backing on the headlights housing. Should you be unable to find or access the screws, verify your vehicle’s owner manual for additional data. However, some automobile producers make it a small a lot more tough, such as by obtaining you attain underneath the automobile to get at the screws.
Step 3
Remove the bolts above the headlight with a socket wrench
After locating your adjustment screws, the subsequent factor you want to do is take away the bolts. The bolts are on the car’s frame, correct above the grill. Using your socket wrench, safe the bolts and rotate anti-clockwise till the bolts come off. Once they are off, be cautious not to pull the headlight also far due to the fact the electrical wiring will nevertheless be connected.
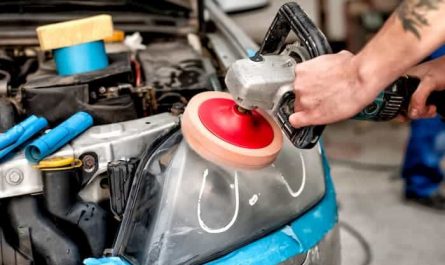
Once disconnected, set the headlight on a clean, soft towel for protection even though altering out the adjustment screws. You can go the added mile of cleaning your headlights if you really feel they are oxidized with a headlight restoration wipe.
Step four
Disconnect the electrical wire and detach the clips.
As quickly as you effectively take away the bolts, you will notice a huge plug attached to the back of your headlight housing. Gently detach the clips holding the plugs and pull the plug wire back to detach it from the headlight housing.
Then, pull out the bulb by twisting the ring you will discover close to the center of every headlight. Ensure you take a image of the wiring and bolts just before taking them apart. It will be valuable when you are attempting to place them back with each other later.
Step five
Remove the broken or worn out adjustment screw
Adjustment screws come with a plastic cap that holds them to the headlight. They are typically colored white. In some automobiles, you can basically take away them with no taking the headlight housing apart even though in other people, you may well have to dismantle the headlight housing.
To take away the screws unsung a Phillips screwdriver, slot in the screwdriver to safe the old nuts and turn anti-clockwise as significantly as you can. While you have the adjustment screw exposed, think about coating it with a spray-on silicone lubricant like WD-40.
The lubricant tends to make them a small a lot more harm-resistant and must there be a want for restoring your headlight lens, use the WD-40 lubricant to clean your headlight lens. Install the new screws along with the plastic shields that come with it. Tighten the screws by turning them clockwise just before reinstalling the headlights on your automobile.
Step six
Reassemble and realign your headlights
Finally, soon after reinstalling the new headlight adjustment screws, the subsequent step is to reassemble the headlight and any components you removed from it. Remember I suggested you take photos just before taking any component apart? Well, this is the component you want these photos.
Put back all the components specifically exactly where you located them and when you are prepared to reattach the cover, heat it up gently to soften the glue. Then, repair it in spot and wait up to an hour for it to harden once more. When that is completed, push the headlight back into your automobile, reattach the electrical cords, and bolt it to the frame.
Another factor you want to do quickly is to re-align your headlight so it does not blind other oncoming autos.