One of the regularly asked concerns we get right here at Clear light tech, is among LED and HID bulbs which is better? Although we’ve addressed this query in the previous, we’ve also identified out that auto owners are nonetheless getting difficulty keeping their decision of bulb for their auto. With LEDs bulbs becoming the lighting of decision for auto makers and auto customers who want to get pleasure from brighter auto lighting, we’ve compiled beneath a list of 7 auto bulbs upkeep suggestions that auto owners can carry out themselves. But initial issues initial!
DIY suggestions to maintain your car’s lights clean
Know how to clean your headlights.
Keeping your car’s headlights and taillights clean is the easiest and greatest way to make certain they keep in a ideal functioning situation. Moisture can accumulate inside the head and tail lights, lowering beam strength and generating the lights dirty. When you wash your automobile, you most likely clean the headlight and taillight covers. However, the inside of the lamp should be cleaned as effectively. To find out how to get rid of the bulb cover and clean the lights, verify out our write-up on how to clean the inside of a sealed headlight.
Never modify a single light bulb.
If your auto needs bulb replacement, by no means do it for only 1. Keep in thoughts that headlights and taillights are sold in pairs. You’ll require to purchase new lights in pairs when you replace the element. This will make certain that your light remains constant and evenly displayed although you drive.
Check the beam strength of the headlights
Headlights, like light bulbs in your property, can shed their beam energy more than time. As a outcome, if you see any indicators of dimming, take your auto to a mechanic to have the lights checked. If the lights are dimming, it is time to replace them. Don’t wait till all of the lamps have gone out. Fix the issue when and for all.
Existing bulbs must Be upgraded (if necessary)
It’s basic to boost the beam strength of your car’s OEM head and tail lamps. This must be a excellent investment if you drive at evening in areas that are not effectively-lit often. Some bulb upgrades can boost your car’s present beam strength. Consult a auto mechanic to learn if your vehicle’s lights require to be upgraded.
Invest in LED bulbs.
LED bulbs are accessible for your auto in the identical way that they are for your property. These LED auto bulbs, like the property bulbs, are brighter and far more power-effective than standard bulbs. As a expense-successful upgrade speak to your mechanic about installing LED lighting in your auto. However, if you choose to do it oneself, right here are some steps to upgrade your stock headlights to LED.
Yellowing and haziness must be addressed.
The brightness of foggy or yellowed headlights is lowered. The yellowing of the headlights is partially brought on by sunlight. It can also put on down the headlight’s polycarbonate, causing it to grow to be dull and blurry. The yellowing of the lights may possibly also be brought on by chemical substances and smog from your vehicle’s engine. Professional headlight restoration treatment options can be utilized as portion of auto upkeep to restore the shine and brightness of your headlights swiftly.
7 DIY steps for replacing burnt-out headlight bulbs
Until:
Step 1:
Before you commence, double-verify that the headlight bulbs require to be replaced. Dirty headlights and not the bulbs inside might be the purpose for a car’s poor lighting. As a outcome, keeping the shine and cleanliness of your headlights is essential for them to emit suitable lighting.
Step two:
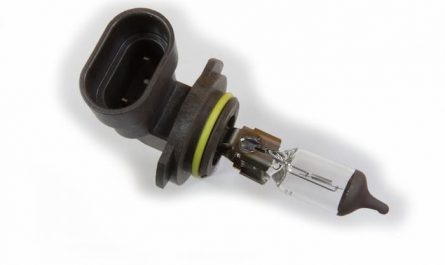
The issue should be burnt-out bulbs if the headlights are in fine shape. As previously mentioned, you should initial know the sort of appropriate bulbs for your auto ahead of proceeding with the strategies beneath. This information can be identified in your car’s manual, or you can acquire it from any auto components shop. Tell the cashier your car’s model and year of manufacture, and they will advocate the greatest bulb for your auto.
Step three:
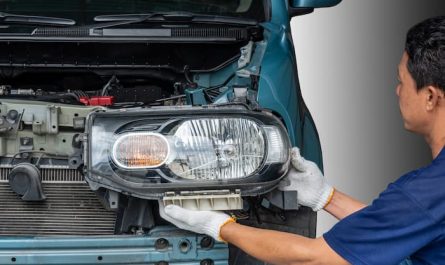
Locate the backside of the headlights by opening the auto engine bay.
Step four:
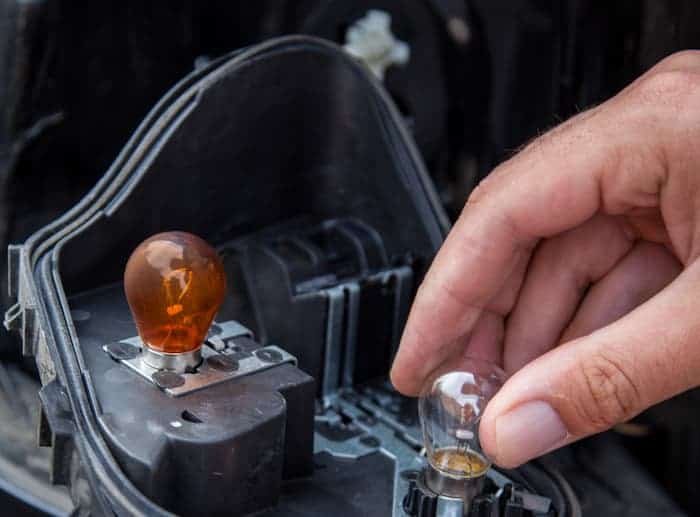
There is a plug attached to electric wires at the headlight base, and you should disconnect these wires ahead of replacing the bulb. Because they are held in location by a variety of supplies, you should use a selection of disassembly strategies that are compatible with their holders: • If the holder is a plastic catch, take the plug out by pushing down slightly at the prime. • If the holder is produced of metal, pull it up and away. • If the holder has a screw cap, you will require a screwdriver to unscrew it.
Step five:
Now that the bulb has been disconnected from the energy wires, you can replace it with a new 1.
Step six:
Remember to use tissue or gloves to set up the new headlight bulb to stay away from oil on your skin from damaging it. Then wipe it clean with a tissue, replace it in the plug base, and reconnect the wires.
Step 7:
To test the new bulb’s efficiency, turn on the auto headlight.
Tools:
Car owner’s manual
Gloves
Screwdrivers
Correct bulbs for your model
Don’t wait till you get a fine for a broken headlight or you are in the middle of a road danger simply because your auto lights are not functioning appropriately. Make it a habit to place the suggestions we’ve outlined in this write-up and incorporate a headlight restoration wipe into your normal upkeep program to stay away from any threat of a auto accident.