Many people’s automobiles are much more than just a mode of transportation they also represent their personalities. Tinted tail lights are becoming increasingly typical as a enjoyable and straightforward way to customize your car’s appear but then, are tinted tail lights legal or illegal? Professionals can tint your taillights, or you can do it your self in your garage. All you will need to have are a couple of simple directions and some readily offered supplies from a hardware retailer.
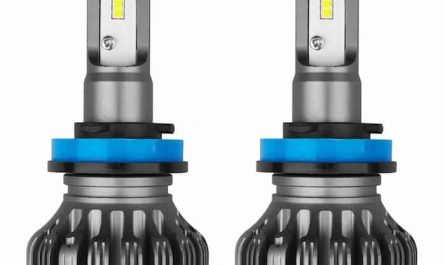
What is a tint for tail lights?
Tinting is a approach for stopping distinct wavelengths of light from passing by way of a vehicle’s protective glass, such as windows and windshields. To some auto owners, Tinting is merely one more way of how to use headlights or taillights. Tinted tail lights are ordinary tail lights that have been tinted to give them a dimmed look.
Benefits of tail light tint
Tinted tail lights give you a much more appealing look:
Changing your tail lights’ opacity offers your auto a special appear and really feel. For a much more ’90s really feel to your retro auto or a sleeker appear to your Camaro, for instance, you might want to add a darker tint. Whatever your inspiration, tail light tinting improves your car’s design and style to match your private style and the character of your car.
Tail lights with tinted lenses supply added safety:
Applying a tint to your headlights or taillights protects them from UV harm.
Tail lights with tinted lenses boost visibility:
When driving, auto tail light tints shield the driver behind you from bright blinding car lights or damaging glares from tail lights and direct sunlight. Tail light tints, in certain, can aid steer clear of cloudy tail lights, which can hinder visibility although driving.
Tail lights that are tinted save you from getting new tail lights:
You can steer clear of getting new shaded tail lights by tinting your current ones.
Steps to tinting your tail lights effectively
Remove the tail lights from your auto:
To effectively tint your taillights, you will 1st have to eliminate them. Simply open your vehicle’s trunk and lift the carpet liner to the side. Both of the tail lights must be secured by two bolts, which you must be in a position to find. Make use of your screwdriver to loosen the bolts. Take out the prongs that attach the bulbs to the socket to disconnect them. You can now eliminate the taillights right after you have completed the job effectively. Repeat the process with the other tail light.
Sanding the tail light:
Since we’ll use an aerosol spray to tint your auto tail lights, make confident the surface is totally smooth ahead of proceeding. To do so, take some 800-grit sandpaper and soak it in clean tap water ahead of rubbing it on the tail lights’ surface. Continue till the tail light is scuffed and the paint is dull to the touch. It’s OK to use a small dishwashing soap on the location, but this is totally optional. Repeat the very same issue with the other tail light, guarantee the final results are promising and even otherwise, you may well be frustrated when you start off spraying the surface with tint.
Wipe the tail lights clean with a clean rag or paper towels as soon as you are completed. Allow drying for a couple of minutes. After that, wet some 1000-grit sandpaper and start off rubbing the surface once more, wiping it clean when you are completed. After that, sand your taillights with 2000-grit sandpaper in sturdy but smooth strokes to give them a hazy texture. Finally, scrub the tail lights with oil, rubbing alcohol, or a couple of squirts of window cleaner.
Stick masking tape on your tail light:
Use masking tape to tape the tail light regions that you do not want to paint on (or some kind of adhesive that is each effortless to apply and effortless to eliminate). Due to visitors guidelines, the reverse lights need to be clear, so use masking tape to them as effectively. Make clean cuts on the video, maintaining in thoughts that applying the tape will have an effect on the tinted area’s all round outcome.
Start spraying:
After you have double-checked that your tail lights are totally dry and that all required components have been sealed, you can apply the spray tint. Before making use of the spray, please give it a very good shake. Wear a mask to cease inhaling the fumes and position the tail lights on a flat surface that you do not thoughts obtaining paint on. Begin by painting each tail lights with a little, even coat of paint. Spray all tail lights at the very same time to guarantee a constant tone. Allow about 30 minutes for the 1st layer to dry.
Sun dry the tail lights:
After you have tinted your tail lights, spot them on a flat, clean surface exactly where they can be dried by the sun. Safely eliminate the masking tape.
Spray on some clear coat:
A clear coat protects the physique of your car’s exterior from dirt and harm. If you want your tint job to appear good and final, we recommend following this step by step method of applying headlight coating and carrying out the very same issue for your tail lights. Applying the clear coat is not as well hard and is close to applying the tint. Simply reposition the tail lights in your spraying location, shake the canister, and apply a thin coat of clear coat. It would be greatest if you enable the 1st coat to dry ahead of adding one more clear coat layer to make it thicker. You can add as numerous layers of clear coat as you want. For the greatest final results, up to ten layers of clear coat can be added.
Put the tail light back in spot:
Get some rubbing compound from your nearest auto shop ahead of you start off placing your tail lights back in order. To maintain your tail lights searching fresh, apply this with a clean cloth to the tail lights. After that, you can return your vehicle’s sharp-searching tinted taillights to their suitable position.
Conclusion
Tinting your tail lights and restoring oxidized lights with restoration wipes can seem to be a hard job, but it is in fact effortless. All you will need to have is the proper set of lights, your preferred aerosol tail light tint, a couple of supplies, and this DIY guide.