
H1 LED Bulbs, 2024 Upgraded Ultra-Bright 20000 Lumens, Cool White 6000K
It is against the US Headlight Law to not have your headlight on when visibility is seriously decreased. To stay away from receiving a ticket, we suggest you often verify them, specially ahead of embarking on a evening-time trip or in the course of undesirable climate situations. To diagnose your vehicle headlights, you can have a person operate the switches even though you stroll about the vehicle to inspect every light. Side and taillights, headlamps (major and dipped beams), path indicators, quit lights, and a rear licence plate light are all essential to be functional for your vehicle to be road worthy. So, how do you test the headlight bulbs with a battery? Suppose they’ve refused to come on.
Before testing your vehicle bulbs, you want to make positive that absolutely nothing is interfering with the bulb’s beam. Start by wiping the complete headlight lenses making use of a clean towel. For a finer finish you can make use of a Headlight restoration wipe to eliminate any oxidation or dirt residuals from the lenses. Additionally, to save the light fixture from becoming flooded with moisture, broken lenses should be changed as quickly as feasible. The reflector will grow to be tarnished due to water, and the lamp will quickly quit functioning due to corroded connections.
Headlight bulb diagnosis

The headlamp bulb might frequently be accessed from inside the bonnet of a contemporary automobile, nonetheless on some models, the grille or lamp bezel should be removed. The major beam or the dipped beam are normally the only two headlamps that fail. This is straightforward to examine in a lamp unit that has a bulb installed: eliminate the bulb, hold it up to the light, and appear for any broken filaments. Halogen bulbs shouldn’t be touched with fingers if they are present. Keep your fingers off it with a clean, dust-totally free cloth to avoid early failure. If essential, clean it with methylated spirit applied to a cloth.
A diverse strategy is essential to figure out no matter whether a sealed-beam unit is defective given that filament harm can not be detected. Where that sort of bayonet bulb holder has been employed, checks on the wiring and connections should take into account the spring-loaded contacts. The lights in that unit could go out due to a stuck plunger, even though a failed insulating washer could generate a brief circuit, dim all the lights, or blow a fuse. A undesirable ground connection among the headlamp and the car’s physique is normally the lead to of a faint yellow light on 1 side. The connection is often just a wire lead that is fastened to the physique nonetheless, if the connection develops a higher resistance due to corrosion or dirt, the light will be faint. To clean the terminal and washers, unbolt the connection and use an emery cloth. To clean the bolt, use a wire brush. The metal’s surface exactly where the hole was drilled ought to be cleaned. Reassemble, then firmly tighten.
When two headlamps are connected, the identical fault might emerge on each. Rust behind the locating flange of 1 or each bulbs, although, is an additional prospective explanation why each lamps are dim. Wherever you learn it, eliminate rust and debris. Fault in the provide to the major lighting switch or among that and the dip switch indicates a failure in each headlamp, each major and dipped beams, on each sides. Check any fuses that are installed in the headlamp circuit to see if they have blown. By placing supplementary driving lamps or installing also-effective bulbs in the major lamps, circuits can grow to be overloaded. An unreliable voltage regulator in the charging circuit is however an additional prospective explanation why fuses or bulbs can blow.
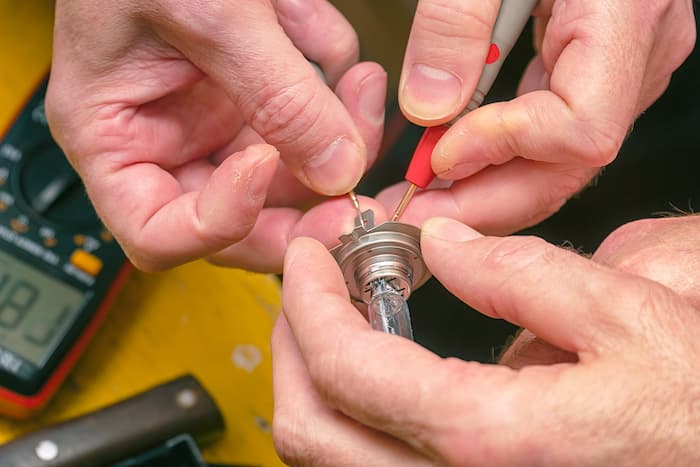
Testing headlight with a battery
- Connect the earth terminal on the battery to the earth tag on the sealed beam making use of a standard test lead and crocodile clips.
- The reside battery terminal ought to be connected to the crocodile-clip finish of the circuit tester. Next, touch the probe to every terminal on the sealed-beam unit in turn.
- Use the acceptable settings on your car’s headlight switch. If a sealed-beam unit has 3 terminals, each major and dipped beam filaments are present if it has only two, 1 terminal is the earth and the other exclusively functions on the major beam.
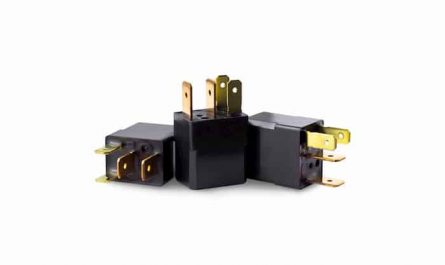
- The bulb is defective if any of the reside terminals are ineffective. Check the connector block and wiring top back to the snap connectors on the car’s major wiring loom no matter whether they are all functional. If they are not, verify the headlight relay.
Testing the headlight connectors

- A sizable rubber guard might be placed more than the connector block situated at the back of the headlight. Include the two-pin or 3-pin a number of plugs to finish it off.
- Turn on the headlights. Connect a circuit tester’s earth lead to a dependable ground, such as the automobile physique, then use the probe to individually inspect every connector terminal.
- The earth is 1 of them. The principal beam terminal, if there is only 1 other terminal, is it. When a connector has 3 terminals all round, it can accommodate each the major and dipped beam. To verify every terminal, use the car’s headlight switch.
- Check the wire and the snap connections back along the wiring loom to the bulkhead if any of the constructive terminals are not functional. Before reinstalling, clean all the terminals.

Now retrieving an image set.
Drop Stop - The Original Patented Car Seat Gap Filler (As Seen On Shark Tank) - Between Seats Console Organizer, Set of 2 and Slide Free Pad and Light
$24.99 (as of May 3, 2024 17:19 GMT +00:00 - More infoProduct prices and availability are accurate as of the date/time indicated and are subject to change. Any price and availability information displayed on [relevant Amazon Site(s), as applicable] at the time of purchase will apply to the purchase of this product.)
Now retrieving an image set.
ComfiLife Gel Enhanced Seat Cushion – Office Chair Cushion – Non-Slip Gel & Memory Foam Coccyx Cushion for Tailbone Pain - Desk Chair Car Seat Cushion Driving - Sciatica & Back Pain Relief (Black)
$36.76 (as of May 3, 2024 17:19 GMT +00:00 - More infoProduct prices and availability are accurate as of the date/time indicated and are subject to change. Any price and availability information displayed on [relevant Amazon Site(s), as applicable] at the time of purchase will apply to the purchase of this product.)
Now retrieving an image set.