
H1 LED Bulbs, 2024 Upgraded Ultra-Bright 20000 Lumens, Cool White 6000K

In this post, we’ll assessment the Halo headlight wiring diagram and how to interpret it appropriately.
Traditional vehicle headlights are not aesthetically pleasing, specifically on newer vehicle models. That’s why far more drivers are transitioning to Halo headlights.
The query is: how do you set up them?
Don’t be concerned. We created this step-by-step guide to aid you recognize the Halo headlight wiring diagram. Letting you replace your car’s out-of-date stock headlights.
At the finish of this post, you will understand how to study and decide on the right Halo headlight wiring diagram for a smoother installation method.
Read on to start off finding out about the Halo headlight wiring diagram.
Halo Headlight Wiring Diagram Explanation
Halo headlights have a special style that tends to make them look annoying to set up. But they’re quite simple to attach to your vehicle when you recognize their wiring diagram.
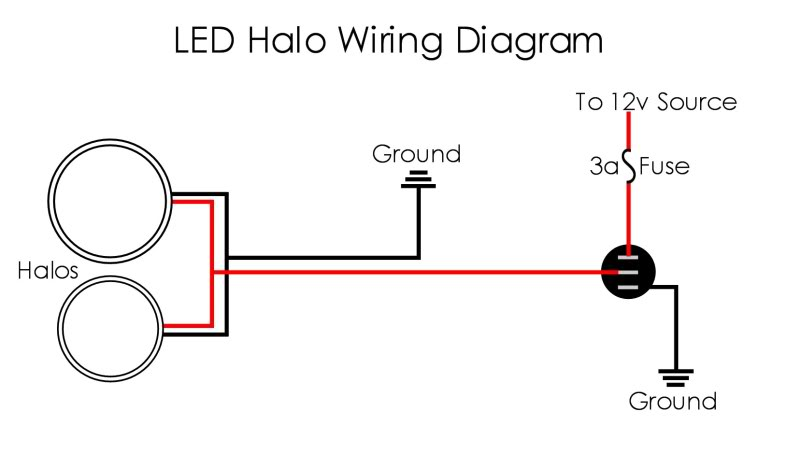
Here’s a sample Halo headlight wiring diagram:

The sample diagram illustrates the Halo headlight alongside its various connections. Each wire is also labeled as follows:
- Red Wire – High-Beam Light
- Blue Wire – Low-Beam Light
- Black Wire – Ground Connection
- White Wire – Halo Daytime Running Light
Once your Halo headlight is prepared, you can proceed with the installation.
Always disconnect your car’s battery just before installing your Halo headlight upgrade.
Start the connection by detaching your original headlight assembly. It’s ideal to assessment your vehicle’s assembly diagram to do this.
Next, replace the stock bulbs with your brand-new Halo headlights. Make certain to connect the wire to the corresponding plug of your car. Again, it is ideal to use your car’s diagram as a reference even though performing this.
You’ll then connect the white wire to your vehicle’s accessory energy terminal or any 12V battery supply. If your vehicle does not have a single obtainable, affix it to your brand-new headlight’s blue wire. This activates the Halo Daytime Running Light.
Reattach the headlight assembly to your vehicle to finish the installation. It was that rapid!
Keep in thoughts that not all Halo headlights have the exact same method. But they’re all comparatively related. You ought to also don’t forget to get the wiring diagram particular to your car’s make and model to help you in replacement.
Where You Can Find The Correct Halo Headlight Wiring Diagram
Not all Halo headlights are compatible with each and every car. That’s why it is crucial to have a copy of your car’s headlight wiring diagram to know which upgrade is compatible.
You can swiftly grab a copy of your car’s headlight wiring diagram from the manufacturer’s official site. Indicate your vehicle’s make and model to get the precise schematics for the installation process.
It’s ideal to appear for Halo headlights that match your car’s headlight assembly. Many aftermarket makers have their replacements’ schematics obtainable on their official internet sites. Letting you evaluate their wiring diagram from your vehicle’s to guarantee a best match.
How To Test Halo Headlight Wiring
You ought to 1st test your upgraded Halo headlights just before taking them out for a drive. Ensuring you that they’re functioning as they ought to. There are a couple of approaches to do this.
One is by basically turning on your new headlights. You’re very good to go if they turn on with no dimming or flickering. If not, verify for loose or mismatched connections in your car’s headlight switch. Ensure that every wire is inserted into its respective terminals.
You can also test your car’s headlight switch circuit with a multimeter measuring Ohms. This guarantees all terminals have continuous electrical energy, efficiently powering up your newly installed Halo headlights.
Now that you have discovered how to set up a Halo headlight, upgrade your vehicle! Always don’t forget to have a copy of your vehicle’s headlight assembly diagram to help you in the replacement method.

Now retrieving an image set.
Premium Leather Car Registration & Insurance Card Holder with Magnetic Shut - For Documents, Cards, License
$7.74 (as of May 3, 2024 17:19 GMT +00:00 - More infoProduct prices and availability are accurate as of the date/time indicated and are subject to change. Any price and availability information displayed on [relevant Amazon Site(s), as applicable] at the time of purchase will apply to the purchase of this product.)
Now retrieving an image set.
Deosk Trunk Organizer with 6 Pockets - Car Storage Accessory for SUVs, Minivans, and Trucks - 50L Waterproof Polyester (Medium, Beige)
$16.99 (as of May 3, 2024 17:19 GMT +00:00 - More infoProduct prices and availability are accurate as of the date/time indicated and are subject to change. Any price and availability information displayed on [relevant Amazon Site(s), as applicable] at the time of purchase will apply to the purchase of this product.)
Now retrieving an image set.